

The photography composition tip you need to improve your photos: less is more
I thought a lot about how to improve the composition in my portrait photography. Not seeing enough progress with all those fancy techniques, I gave up and tried to focus on something else. Unexpectedly, the solution came from outside photography. Looking closely at famous paintings, I finally understood what was wrong with my composition: too many details. In this post, I’ll expand a bit more on why I think this is important. Then, I’ll show you some before/after examples of my photos and explain different ways of hiding or removing unnecessary details. You can also check out this tutorial that can help you learn composition faster as well.
You can read this post which has a lot of helpful insights or you can also watch this video:
What is present in great art but not in bad photography
I read numerous blog posts about different composition rules and techniques. All of this was useful at first, but at some point just using them didn’t seem to help my photos improve that much. Not surprisingly, I didn’t have any major breakthroughs when reading about the rule of thirds for the hundredth time. So I decided to set this goal aside and went on learning more about other visual arts instead.
How painting helped me improve my photography composition
Looking more closely at different artworks, I tried to see what makes them work so well. One thing that I discovered was that if you look closely at great paintings there’s never anything odd. Every detail in a painting has its meaning. Usually, a detail should either decorate or enhance the style of the main subject. In some cases, it might appear as a symbol with its own message but without distracting from the main idea. For most of its existence, art and photography served a purpose and had a message to convey. So what I mean is that there should be a clear idea of what you want to show in every picture. It might be anything: an event, a person, or a simple object.
Learning all of this helped me not only feed my curiosity but also bring my photography composition to the next level. I finally understood what was bringing down some of my photos. Now I often notice that bad images are ones without an idea or where you can’t see it. Most of the time it happens because of the elements that distract the viewer. Knowing this, I pay close attention to all the objects in the frame when taking a photograph. I try to minimise details that distract the viewer from my main subject.
This already helps a lot, but quite often you can’t get rid of all distractions around your subject while shooting. What helps me even more, is editing out some details in post-processing.
Another post that may help you to learn a more minimalist editing is my new article dedicated to the topic of making your digital photos look like film.
How to improve your photography composition in post-processing
Photo editing can greatly help you to improve your photography composition. Photo editing is as important as taking pictures and this is about half of the work you should do.
Here I want to show what changes you can do to your composition in post-processing and what errors you can fix when editing your pictures. Not always we can do a perfect shot straight away so this is what can help to greatly improve your pictures.
I didn’t want to show someone’s work as a bad example. Here you’ll see some of the older and more recent photos that I tried to improve by reducing the details
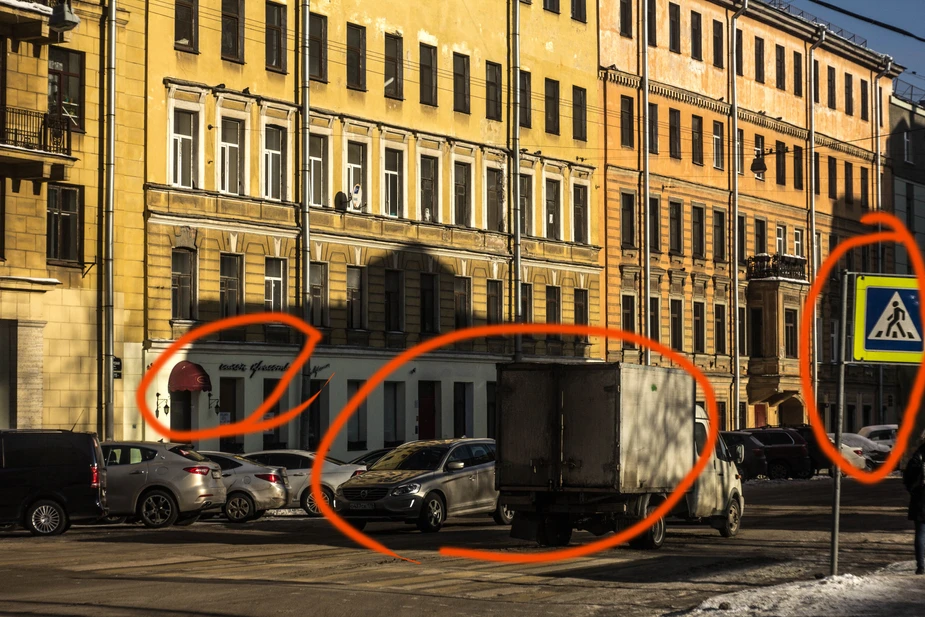
Hard to say what I wanted to show in this picture back in 2017.
I circled the details that don’t help to show the idea of the shot. Probably, I liked the shadow on the other side of the street… but was too lazy to come closer and photograph it separately. Bearing this in mind, we can clearly see how everything else creates a lot of distraction. The cars, the sign, and the details in the shadows make it look like a random shot of a random street without any point of interest.
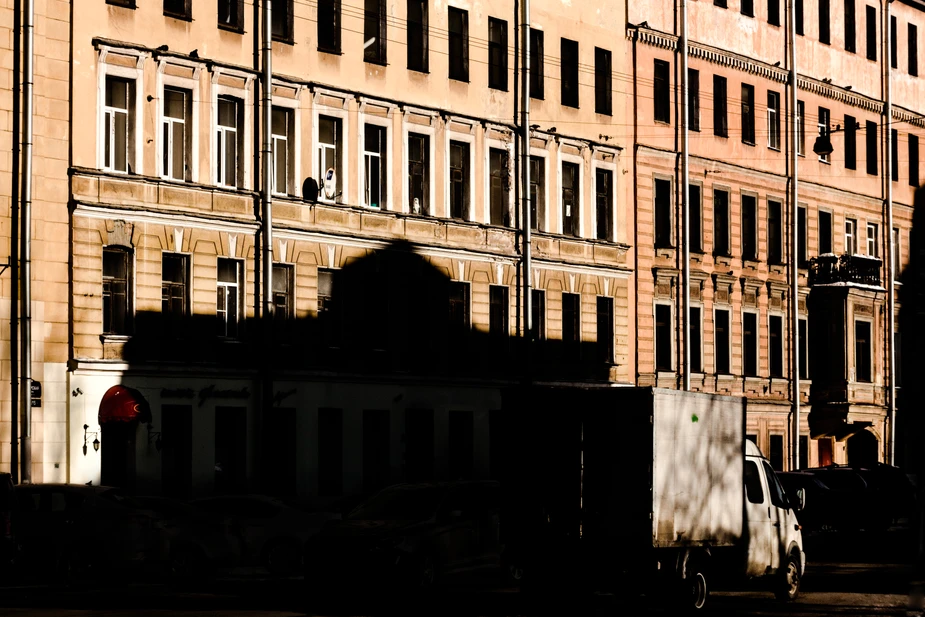
To make the composition more appealing, I first cropped the image and darkened the shadows. Later I realised that the cars are still looking bad and cars are always a problem. Cars are seldom esthetically pleasing and I usually try to avoid photographing them. To save time, I just painted them black since they are already in shadow. I can’t say that I like this photograph now, but it is already better.
A bit of a newer example of how to improve an image by removing details.

Before
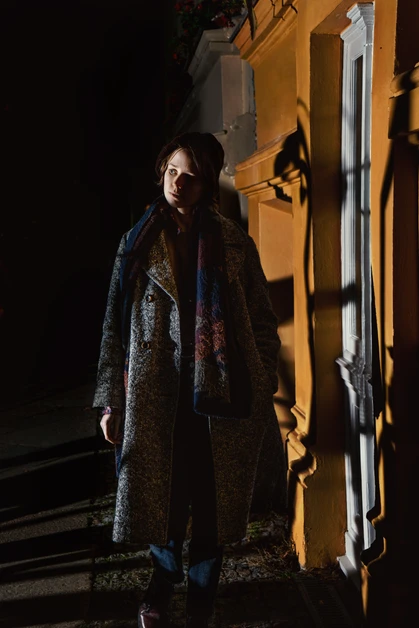
After
Here I’ve hidden the lights on the back and some plates/signs on the wall just to make it appear clear. By the way, if your idea is to show a messy place then, of course, all the graffiti will help. Just make sure you can see the main subject between them.
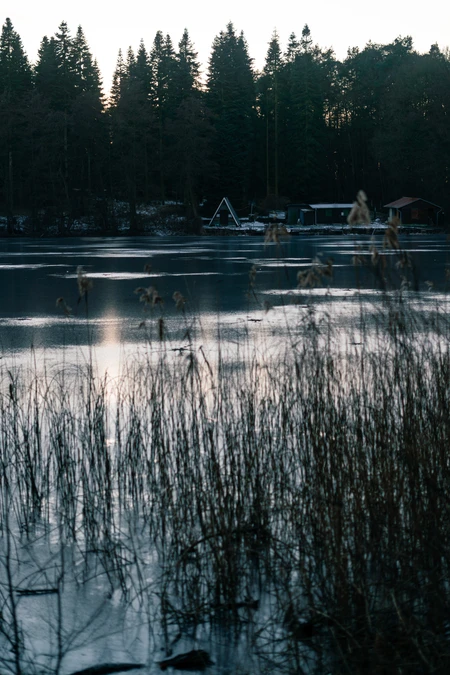
And one more image. On this one, I removed some houses and made the forest a bit darker. Lastly, I made the forest cabin brighter and colder. This is to create some contrast and to shift the focus of the photo towards it.
Before
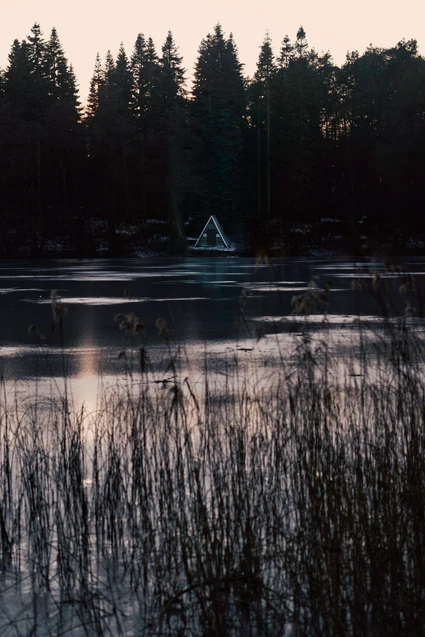
After
It’s always a good idea to show less in your images and leave only the details that have meaning. In the example above you can clearly see how I change the light in a photograph in post-production.
Now it’s your turn. Look closer at this photo and decide what you would remove here. I have included my edited version below, but this exercise would benefit you the most if you try deciding for yourself before looking at it.
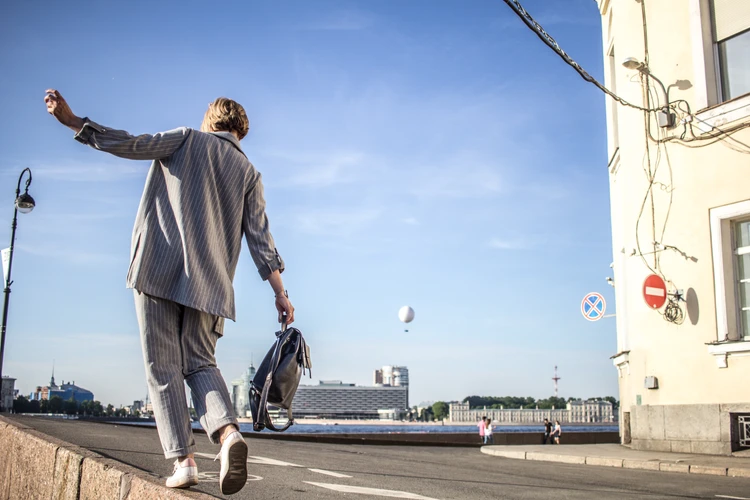
Before
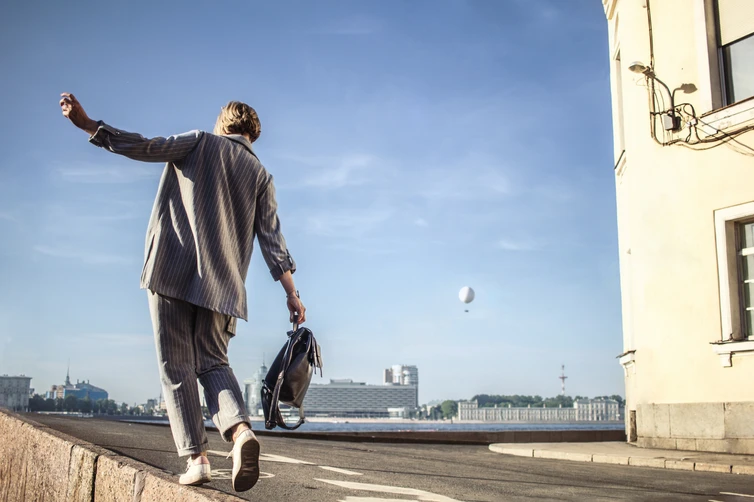
Here is my reedited version.
Some quick photography composition tips
- Try to come closer to your subject, or crop out everything unneeded
- Try to find backgrounds that will not take too much attention. Often people photograph someone/something on a bright background with loads of details. If you want to photograph a bicycle and there’s a fast food restaurant in the background with bright logos and ads – try adjusting the angle. Your subject should have more contrast to attract attention.
- Use an open aperture to blur the background out. Sometimes it’s not the best solution but the easiest.
- Shadows are a good tool to hide parts of a picture. Your camera doesn’t see the world the way you see it. Shadows appear darker than you see them in real life. Nevertheless, in most cases, it’s better to make them even darker.
My new photos where I apply these techniques
Hey, Fedor from 2025 is here, and I apply all of these things in my photography to this day. I started doing less minimalist photography than back then when writing this post but still these points are quite true. As a little inspiration of what you can achieve if you leave only important stuff in your picture while stripping everything else as much as possible, I’m happy to share some of my newer work from the last 2 years.


If I could give you just one piece of advice for improving composition, I would say this. Ask yourself “Do I need this in my image?” for every object in your frame. Every time you see a random car, a street sign, or a person at the edge of the frame, you should stop and think. If it doesn’t add anything to the idea of your photo – remove it if you can. Your pictures will get better, once you remove everything odd.
This post is one of the posts aimed at improving photography skills. For focusing more on composition I would suggest checking out my most important articles about black and white photography and silhouette photography. These topics are bound very strongly to compositional theory and are aimed to improve your vital skills in photography!
If you liked this post and want to learn more from me, you can check out my FREE course on my Patreon where I structured info in a form of classes with practical exercises and a curriculum for a couple of months
Comments are closed.